Author Topic: The Kaya Project (building a new workshop)  (Read 20276 times)

kibi

  • Full Member
  • ***
  • Posts: 121
Re: The Kaya Project (building a new workshop)
« Reply #15 on: August 17, 2012, 04:08:38 PM »
Running fibre links reminds me of another little side project that I really must get on with.
My old, excellent, never crashed in it's life, Nokia IP330 router (running pfSense) needs to be retired. It's AMD K6 450MHz CPU can only route traffic at 35Mb/s ish (without IPsec). My provider has recently and apologetically doubled our connection to "only" 100Mb/s (downstream) with a promise to give us the full 120Mb/s within the next 3 months. I'm going to need new hardware to cope with this. I might commission my idle HP DL360 into service for routing tasks. I'll have to check if the the network interfaces in this machine are vLAN capable and check out it's energy usage first. The Nokia is really noisy, but reasonably efficient.

However, the workshop comes first :)

kibi

  • Full Member
  • ***
  • Posts: 121
Re: The Kaya Project (building a new workshop)
« Reply #16 on: August 21, 2012, 05:30:21 PM »
I have made a little bit more progress.

I've got a much better door on now. It still needs to be insulated, but I'll do that once the latch and maglock are fitted.


I've also got the sub-floor complete and most of the plasterboards up. Oh yes, I also cursed each and every one of those Phillips head plasterboard screws, every single one cam'd out unless a metric kiloton of pressure was applied to the back of the driver. Rubbish screws, worst invention ever.
Please excuse the noise on the below picture, I quickly took these photos with a telephone.


« Last Edit: July 01, 2015, 06:48:28 AM by kibi »

SeanB

  • Administrator
  • Hero Member
  • *****
  • Posts: 1019
Re: The Kaya Project (building a new workshop)
« Reply #17 on: August 22, 2012, 12:56:36 AM »
Certain of them are utter shite, but the ones I buy at Pelican MIS are great, each box of 1000 comes with a bit to use, and I find them so useful, in that they can even drill into 1.2mm steel without a pilot hole ( though if you use a regular drill to drive you snap the head off flush) and they work well into thinwall studding.

kibi

  • Full Member
  • ***
  • Posts: 121
Re: The Kaya Project (building a new workshop)
« Reply #18 on: August 27, 2012, 09:52:09 AM »
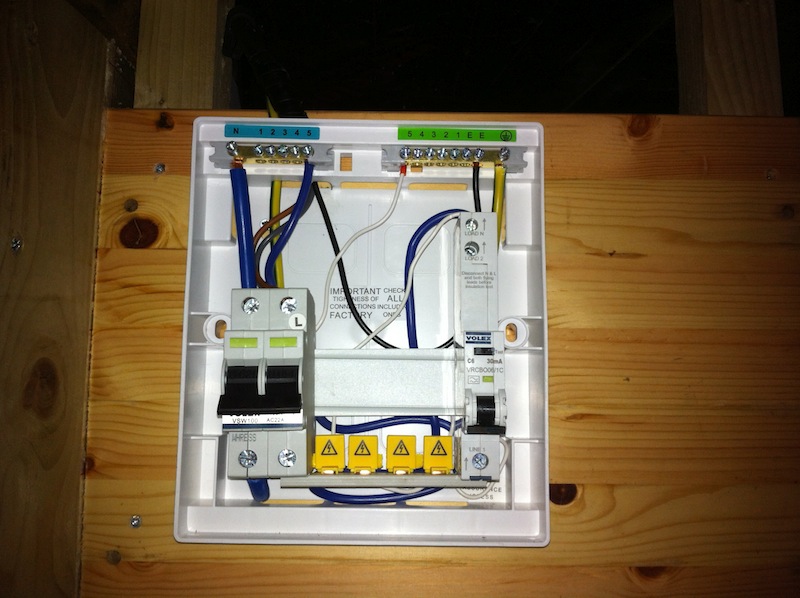
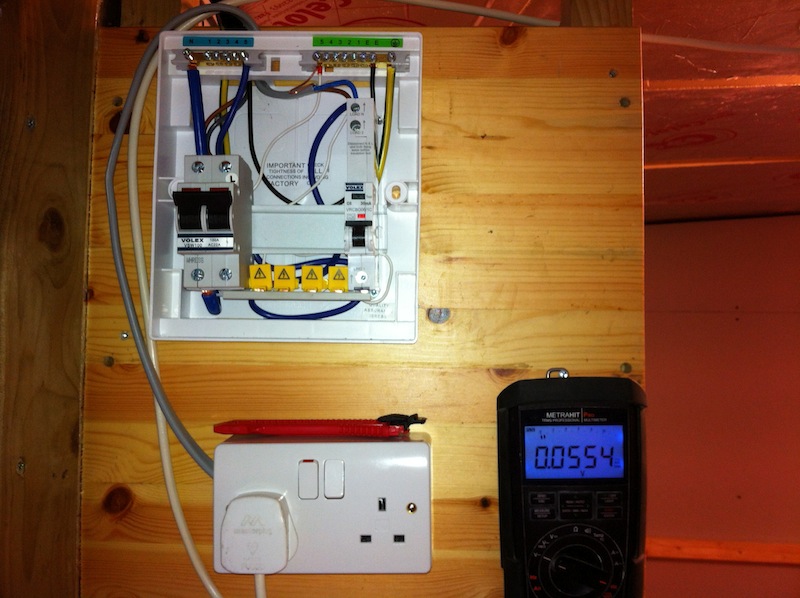
So, finally there is some power in. Not very much power because I still need to get the rest of the RCBO's.
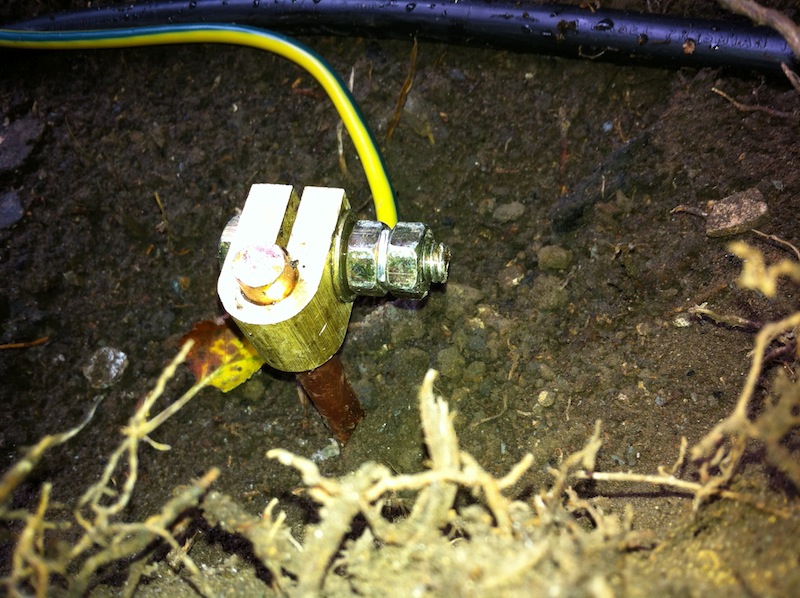
I dug a trench for the power cable and put the earth rod down.

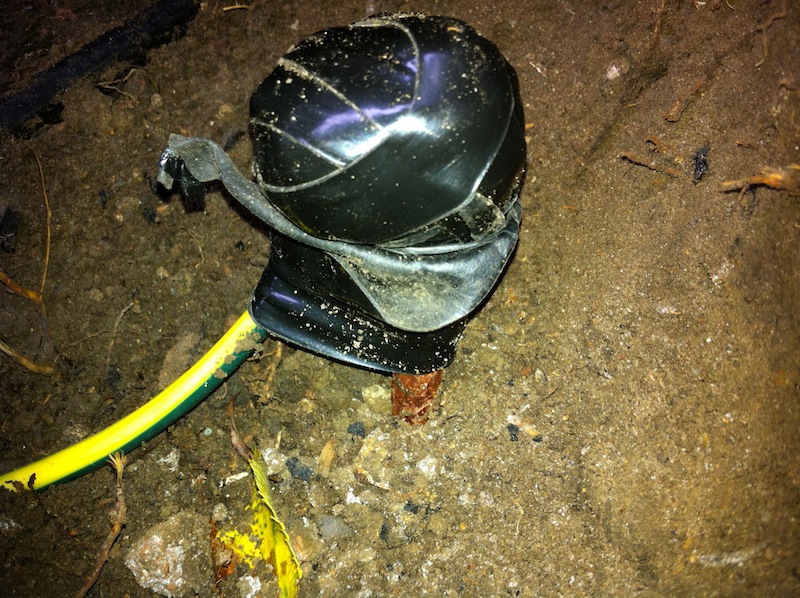
Here is the 1.2 metre earth rod smashed in and a 10mm cable attached.


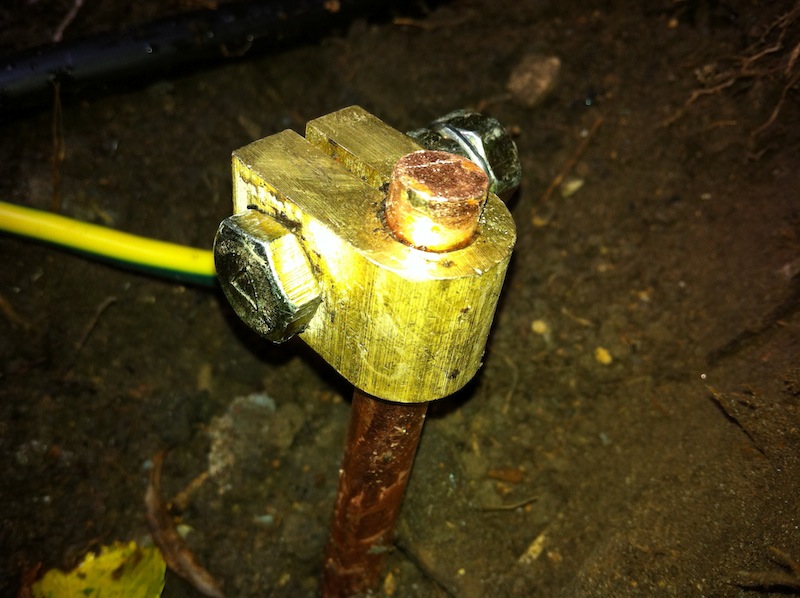
Then, as SeanB suggested, the clamp is covered with grease, a finger from a rubber glove goes over that and then self amalgamating tape over the lot. This prevents corrosion.


Now, if there are any Health and Safety police about, please do take the day off. I am well aware that my board looks poorly installed, but is not complete by any stretch of the imagination. It is working for now and it is providing protection and has only got to run a lamp for the moment.
I plan to mount the Consumer Unit on a hinged board to that I can bring the cables in and out from behind it. This also makes it easier to perform modifications in the future.
All it has now are a 100A incomer and a 6A RCBO. The incomer is what was supplied with the Consumer Unit, the cable is protected appropriately at the head end.


« Last Edit: July 01, 2015, 06:49:07 AM by kibi »

SeanB

  • Administrator
  • Hero Member
  • *****
  • Posts: 1019
Re: The Kaya Project (building a new workshop)
« Reply #19 on: August 27, 2012, 11:15:45 AM »
If I come to your house I will sleep over in there. Nice looking job, looks a lot better than what it was before.

kibi

  • Full Member
  • ***
  • Posts: 121
Re: The Kaya Project (building a new workshop)
« Reply #20 on: August 27, 2012, 12:00:36 PM »
I managed to recover sufficiently from my hangover today to put the worktops on.
The work cannot be completed today because my saw blade is dull.

« Last Edit: July 01, 2015, 06:49:24 AM by kibi »

SeanB

  • Administrator
  • Hero Member
  • *****
  • Posts: 1019
Re: The Kaya Project (building a new workshop)
« Reply #21 on: August 27, 2012, 01:31:27 PM »
Tungsten carbide tipped blades are the best to buy. I only replace them if they get chipped due to hitting a nail or two thousand. The one chipped blade I have reserved for working with aluminium extrusions and drywalling steel. It also does duty as the saw that gets used for roughing work, or for doing doors. Not worried about chipping the blade further, and they last a long time, much better than HSS blades. Stay away from the cheap diamond blades, they are complete and utter shyte, only good for a few quick cuts on soft wood. most of the time i am doing shutterply, or chipboard/supawood.

MJLorton

  • Administrator
  • Hero Member
  • *****
  • Posts: 817
Re: The Kaya Project (building a new workshop)
« Reply #22 on: August 28, 2012, 03:07:44 AM »
Hats off to you for all the great work...and I would second Sean and say I would happily bunk up in the Kaya.

I saw the pictures of the earth rod and the sensible input SeanB has made about protecting it....so I thought I would show you what happens if this simple process is not followed....the neglect falls squarely on me....so I will have to make it right soon...


Play, discover, learn and enjoy! (and don't be scared to make mistakes along the way!)

SeanB

  • Administrator
  • Hero Member
  • *****
  • Posts: 1019
Re: The Kaya Project (building a new workshop)
« Reply #23 on: August 28, 2012, 11:29:04 AM »
Aside from anything cable way too small.......... With an earth rod the cable needs to be a little thicker, the wire to the earth rod must be equal to the wire to the panel, and run in as straight a line as possible to the rod.

kibi

  • Full Member
  • ***
  • Posts: 121
Re: The Kaya Project (building a new workshop)
« Reply #24 on: August 29, 2012, 02:44:29 PM »
Sure, all of these factors could explain your earthing troubles.

SeanB

  • Administrator
  • Hero Member
  • *****
  • Posts: 1019
Re: The Kaya Project (building a new workshop)
« Reply #25 on: August 29, 2012, 03:15:02 PM »
I think Martin's problems are more to do with old wiring, and steel conduit that has corroded underground. I have had the same, proved with the insulation tester that I bought, and disconnected the wiring concerned and ran surface wire in it's place. no way to replace conduit buried in a half meter of concrete short of using a jackhammer.

MJLorton

  • Administrator
  • Hero Member
  • *****
  • Posts: 817
Re: The Kaya Project (building a new workshop)
« Reply #26 on: August 30, 2012, 02:44:07 AM »
Aaaah...one piece of info I failed to included....this earth is not connected to our electrical system. That earth / nuisance tripping issue is related to unbalanced neutrals or some leakage on the lighting circuit. I'll cover this topic when I talk about the install.

I had this earth rod installed for my HAM equipment but it has not been connected yet.

I see your last comment SeanB and I we might have moisture in the walls or roof causing some of our issue....I hope not. The electrician is about to arrive to investigate....
Play, discover, learn and enjoy! (and don't be scared to make mistakes along the way!)

SeanB

  • Administrator
  • Hero Member
  • *****
  • Posts: 1019
Re: The Kaya Project (building a new workshop)
« Reply #27 on: August 30, 2012, 01:37:08 PM »
I am busy with the Ham license as well, applying to write this year.

As to the earth tripping on lights, i will give you some scenarios.
A light in the garden with moisture in it, or a cut in the cable due to a careless gardener.
An exterior light with moisture in the fixture, or damp inside.
A switch for the outside lights that gets damp due to either ingress via the wall or through the fitting itself.
A ceiling mounted unit which is full of water.
Sensor light that is wet inside - especially if you buy the ones from Makro/Game/Builders. They need to be sheltered and waterproofed more than you think.
Weather side wall with water ingress into the conduit, probably at an elbow or a junction box.

A few starter tips for you Martin.

MJLorton

  • Administrator
  • Hero Member
  • *****
  • Posts: 817
Re: The Kaya Project (building a new workshop)
« Reply #28 on: August 31, 2012, 09:11:10 AM »
Thanks SeanB!

You are spot on...and a few of those did apply!
We seem to have the leakage issues resolved....now just need to get the solar wired in through a transfer switch....cross fingers it'll all be done on Monday.
Play, discover, learn and enjoy! (and don't be scared to make mistakes along the way!)

SeanB

  • Administrator
  • Hero Member
  • *****
  • Posts: 1019
Re: The Kaya Project (building a new workshop)
« Reply #29 on: August 31, 2012, 10:52:26 AM »
Those tips are from experience, the only one i did not give was old wire with gutta percha and cotton insulation. I have seen cheap ass rewires where they replaced only the live wire and left the neutral to cut cost.